Manually Backing Up Your Database
Manually backing up your database is key to properly maintaining data in EmbTrak. If you have SQL Server Express (will still read as SQL Server Management Studio), you cannot schedule a backup, so you will have to run it manually. We suggest backing up your database daily -- weekly at the very least.
Not only should you back up your database and save it on the same server or client (computer) that your EmbTrak database is on, but you should also make a copy of that backup and store it elsewhere, like a server on the cloud or a removable hard drive. That way, if something happens to the server where your database and backup are located, you'll still have a copy of the backup to restore from.
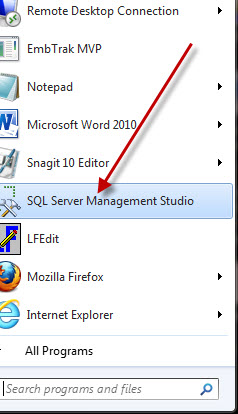
- Open SQL Server Management Studio, either using your desktop shortcut or searching for the program in the Start menu

- The 'Connect to Server' dialog box will open, and you'll sign in with your credentials.
- Most of the time, you can sign in using the Windows Authentication option. This won't require a username or password.
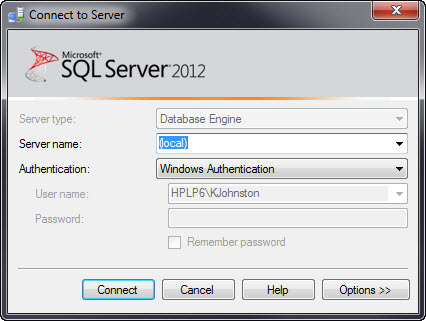
(Note: In my screenshot above, my Server Name is set to (local), which points to the machine I'm on. Your server name may read something different. - However, if your system is not set up for Windows Authentication, you'll sign in using the SQL Server Authentication option. With this connection option, you'll need to enter a username and password, which will most likely be different for each customer.
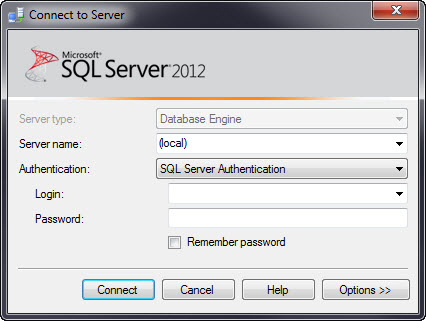
- Click Connect after you've filled out the connection dialog.
- Most of the time, you can sign in using the Windows Authentication option. This won't require a username or password.
- You'll initially see a blank screen after you connect, like the screenshot below:
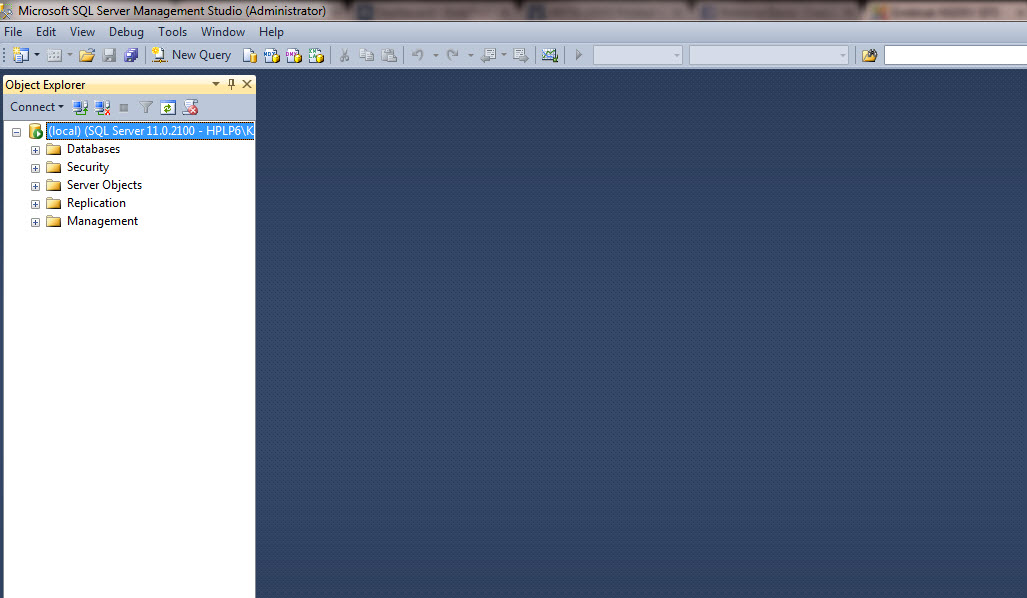
- The left part of the screen is called the 'Object Explorer.
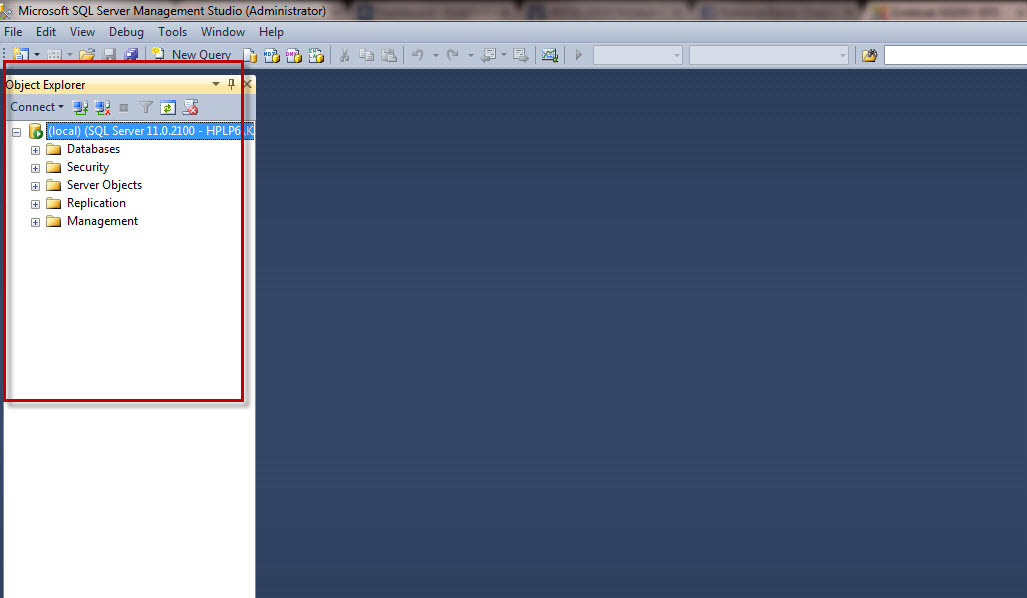
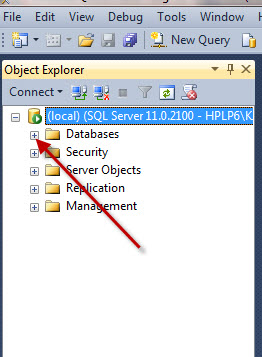
- In the Object Explorer, click on the + sign next to the folder labeled 'Databases.'
- This will expand that folder to display a list of available databases.
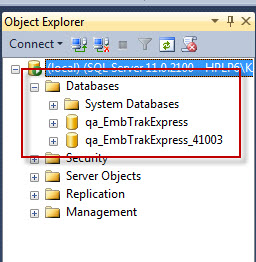
- Right click on the database that you want to backup. The following menu will pop up:
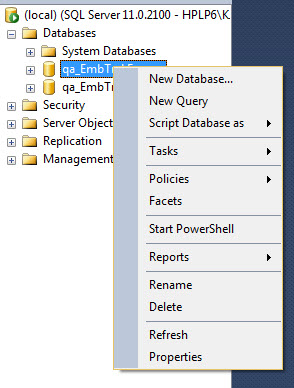
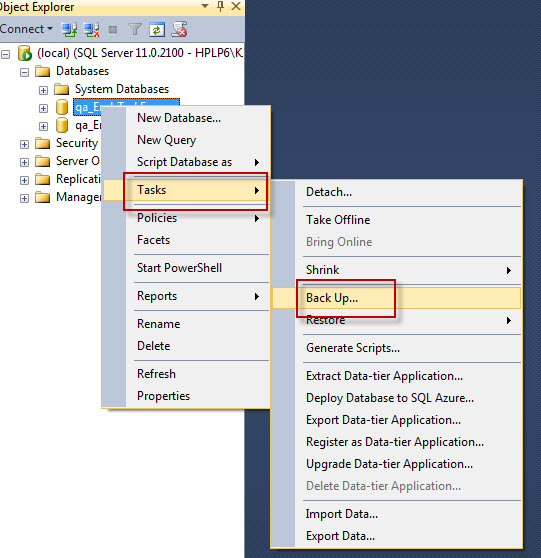
- Click the 'Tasks' option, which will open an other menu. Click 'Back Up' on the second sub-menu.
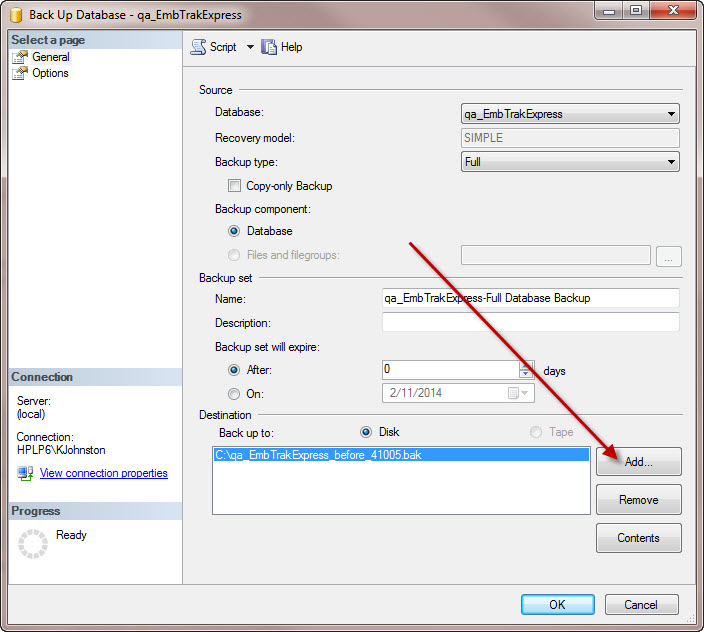
- The Back Up Database dialog box will open.
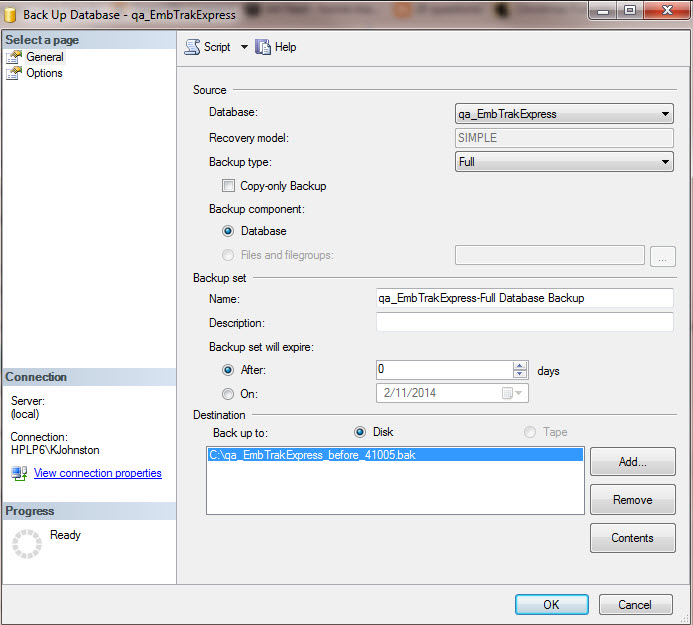
- In the 'Backup set' section (about halfway down the dialog box), enter the name of your backup in the 'Name' box. Even though a suggested name will be present, you can type in whatever you want to name your database. For this example, I'm just going to leave the suggested name as it is.
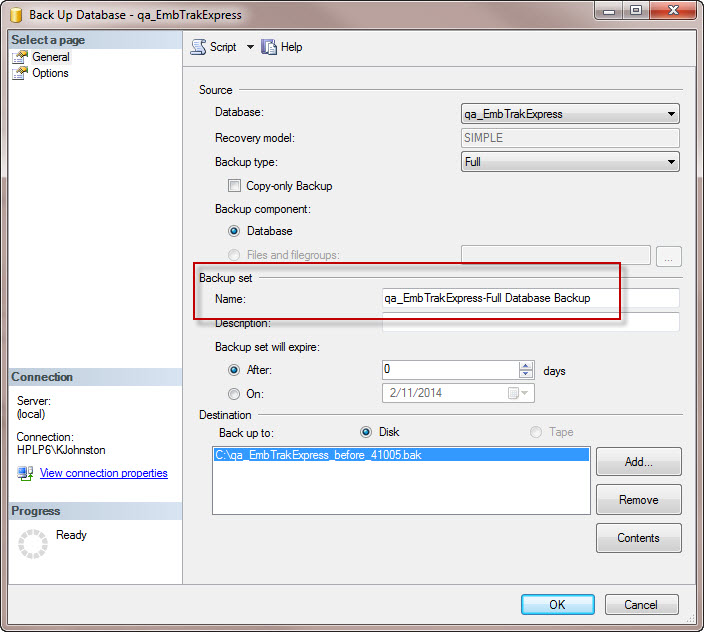
- After you've named your database, click the Add button under the 'Destination' section.
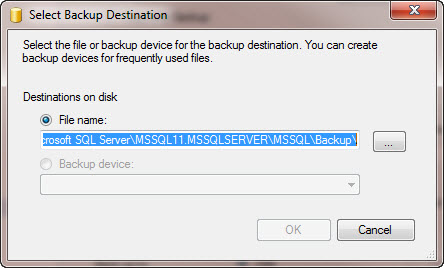
- The 'Select Backup Destination' dialog box will open.
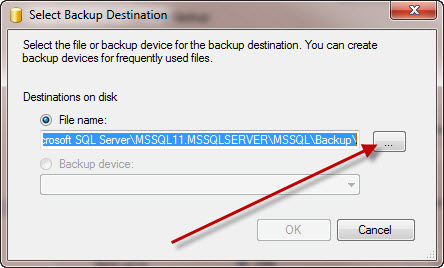
- Click on the '...' button next to the 'File name' field.
- The 'Locate Database Files' dialog box will open.
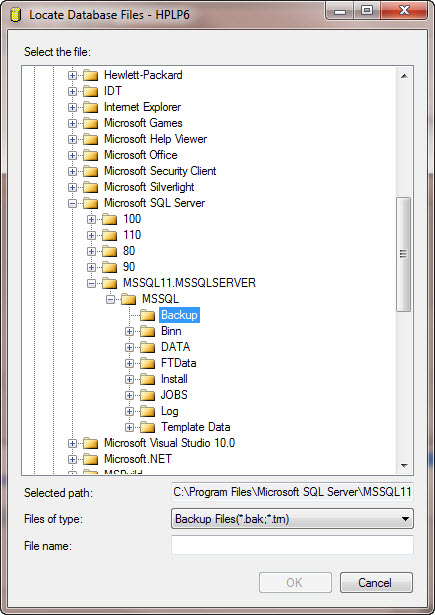
- Find the folder where your 'Backups' folder is located (Hint: It will typically open by default to the Backups folder location.)
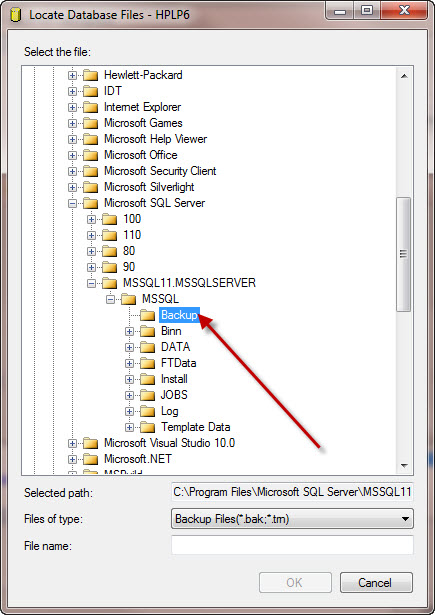
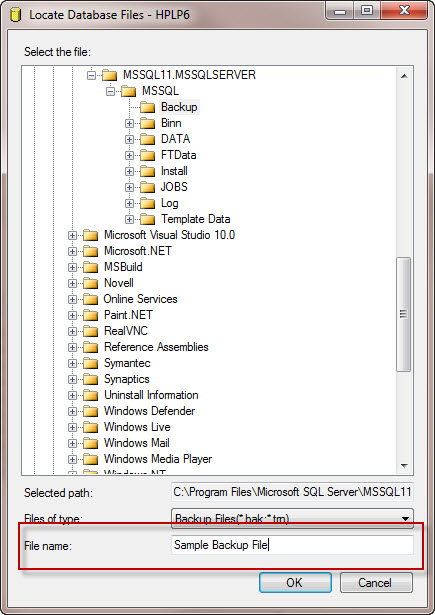
- Once you've found the 'Backup' folder, click on it. In the 'File name' field near the bottom of the dialog box, enter the name of your backup file. You can name it whatever you want. I have called mine 'Sample Backup File.' Then click the OK button.
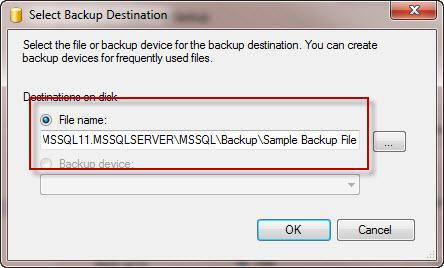
- This will take you back to the 'Select Backup Destination' dialog box. Double check to make sure the 'File name' field is now populated with the file location and backup database name you just chose, and click the OK button.
- Now you're back at the 'Back Up Database' dialog box. The Destination section list now includes the new database backup file name you just created. Select that option by clicking on it. Do not click OK yet.
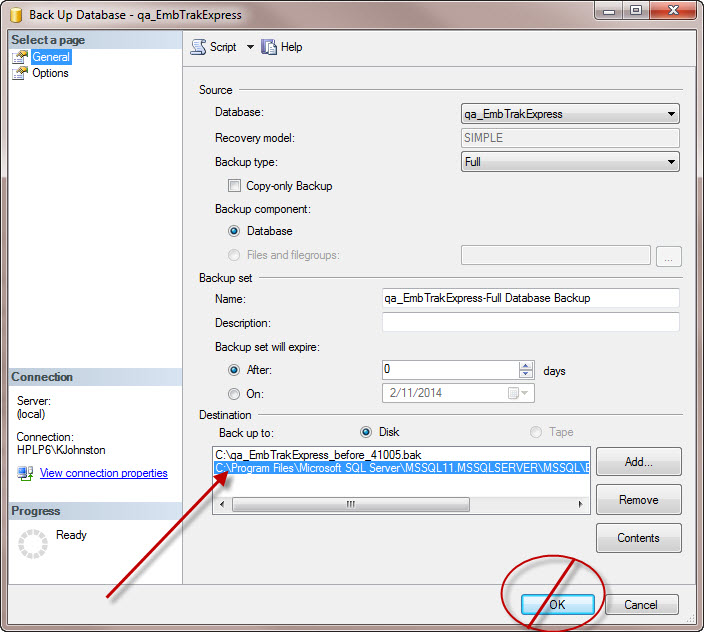
Important: You only need to do the following step about Overwriting Existing Backups if you intend to copy this backup over the current backup. If you plan on making a new backup each time, and not blowing away the old backup, then skip this part. and just click the OK button.
- Next, in the list on the left side, click 'Options' under the 'Select a page' section.
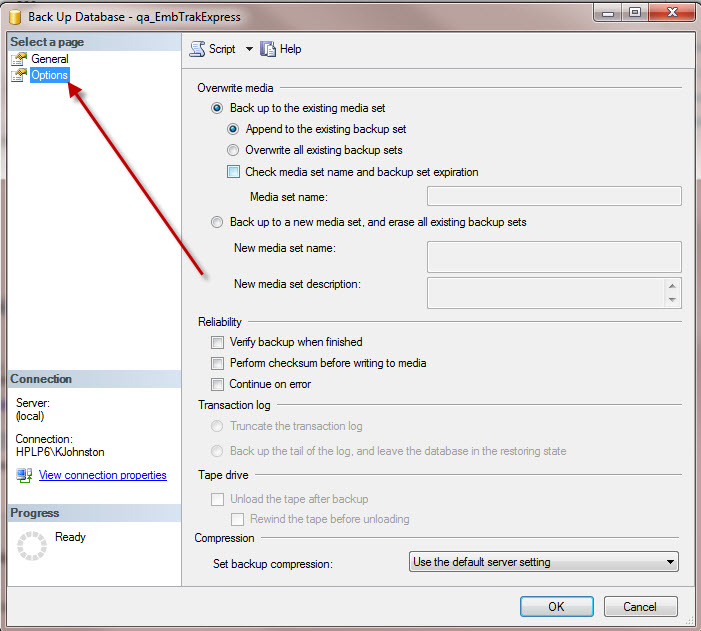
- In the 'Overwrite media' section, select the option 'Overwrite all existing backup sets.' Now you can click the OK button. (Selecting this option will overwrite your previous backup with the same name in the same location. If there is nothing to overwrite, then it will simply create the new backup without overwriting anything.)
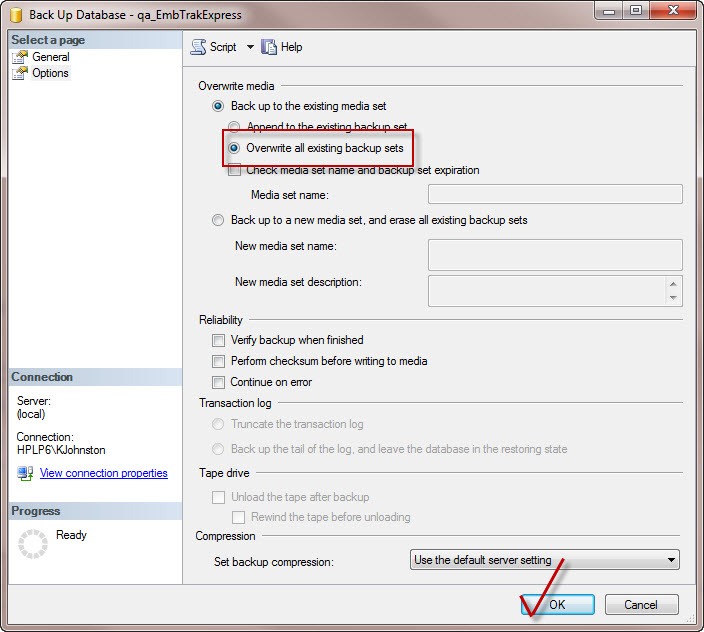
- The Progress section will advise you that your database is backing up. Depending on the size of your database, it may take awhile for the backup to finish.

- After the database backup is complete, you'll get a message telling you the backup was successful.

- Click OK, and your database has been backed up successfully.
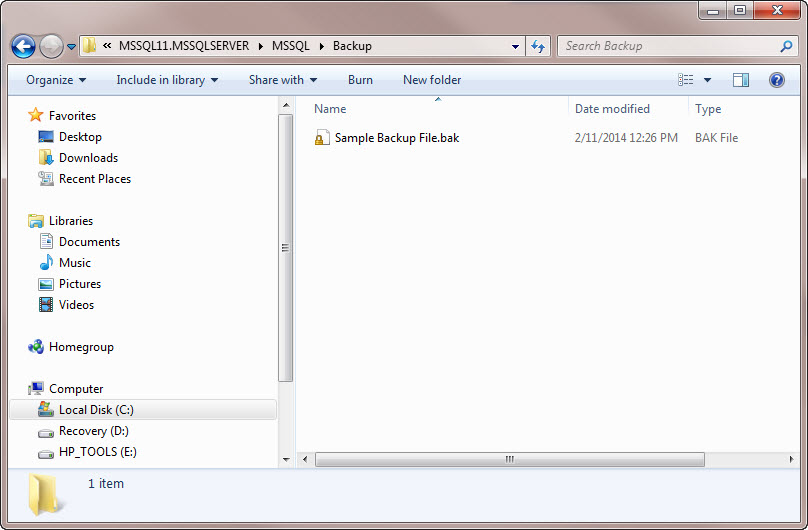
- If you navigate to the path where you saved the backup, you should see the .bak backup file.
